
UPDATED 4/19/23 Plus other Hot Topics – like Fire by Friction
Seems that I am the last camper in North America to have heard of these clever contraptions. Backpackers who go the “ultra light” route have been making simple, lightweight alcohol-fueled stoves for years but my buddy just recently showed me his.
There are many Websites on how to make these from soda cans and there is a wide variety of modifications to the basic design. Just do a web search on “alcohol stove soda can” and you will find many good sites with the details. These things have a real cult-following. When I searched, I got 106,000 hits… Now I are a expert! LOL
The Downside of these stoves from the author of zenstoves.net:
“Lacks Brand Name. – North Face wearing, Mountain House eating, Starbucks drinking, Honda Element driving “outdoors people” will refer to you as “ghetto” and/or “trailer park””. LOL again.
The simplest design is to take two suitable cans, cut the bottom off each one, leaving about a 1 inch tall “cup”. There are various Websites that show you how to safely make an accurate score line with the blade exactly where you want it. (Or you could just use a pair of scissors – I measured the wall thickness, it is only 4.5 mils (0.0045 inches).)
Once scored around with the blade, the thin aluminum just tears cleanly. Stretch the one that will be the “bottom” using a full can as a mandrel, then carefully insert the other one inside as the “top”. Punch jet holes around the periphery of the top part with a common push-pin, plus another slightly larger one in the middle of the top as a fill hole. You are done.

Alcohol Stove top/bottom parts removed from cans
Above: Remove the can bottoms with a utility knife blade. Stretch the sides of the “bottom” one so the upper one will slip-fit inside it. A little bit tricky but easily mastered. Once the two parts are slipped together, pierce the periphery of the top (inner) part as shown below.
Once filled with fuel, the center “fill hole(s)” is then covered with a coin to prevent a gas pressure “leak” when operating. Note to self: Next time just make one “fill hole” in the top. The coin is not a perfect pressure seal.
These are often referred to as “penny stoves”, for the penny used as a fill-hole “plug”. If you are a high-roller, you can use a nickel.
Fun Fact: Since 1982 US penny coins are about 97% zinc, copper plated. Zinc melts at 787 degrees F. How do I know?
 Completed Soda Can Alcohol Stove
The stove works by vaporizing the liquid alcohol that you fill it with, and then burning the resulting gas. Once ignited, the vapor burns as it’s mixed with the outside air and the heat generated warms the stove – which warms the alcohol to its evaporation temperature etc.
Once thermal equilibrium is reached, you are cooking. With my stove, filling the top concave indentation 3 times will produce enough heat to boil a half-canteen cup full of water (12 ounces) in about 4 to 5 minutes depending (significantly) upon the initial water temperature.
To get the stove started it must be “pre-warmed” to begin the evaporation process. Just spill a little fuel on the ground around the stove and light it – it will burn off quickly and the stove will then light from the residual flame on its own. Setting the stove on a small piece of aluminum foil makes this safer and then you can use that foil to cover your canteen cup to speed heating. Simple.

Alcohol Stove Fuels
Regarding fuel, many website McGuyver engineers recommend “Heet”. The Safety Data Sheet listed by the manufacturer, Gold Eagle Company, lists Heet as <= 100% Methanol. It is used as a gasoline fuel line anti-freeze for your car. Use the “Heet” that comes in the Yellow (versus Red) bottle – it burns better.
You can also use denatured alcohol (Home Depot etc). It is more expensive than HEET and apparently the formulation varies between manufacturers and even between batches. It is some mixture of methanol and ethanol and I have found it works a little better than Heet in my experimental stoves, probably because ethanol has somewhat higher heat content that methanol.
I also tried Isopropyl rubbing alcohol but it is only 70% alcohol (the rest is mostly water?) and it does not work very well for me as the others.
Experiment… DO NOT use gasoline, Coleman white gas or anything like that obviously. Their vapors can explode. Duh. You just want slow, controlled vaporization, blue-flame combustion and no soot on your pot. (Don’t burn the Bourbon – That would be alcohol abuse.)
Also, the above photo shows my two experimental stoves. One is a little shorter than the other. The one on the right with the multiple fill-holes also has a small wad of fiberglass wool insulation (it doesn’t burn) inside to to absorb the fuel to prevent spilling the liquid if it is tipped over. They seem to work equally well.

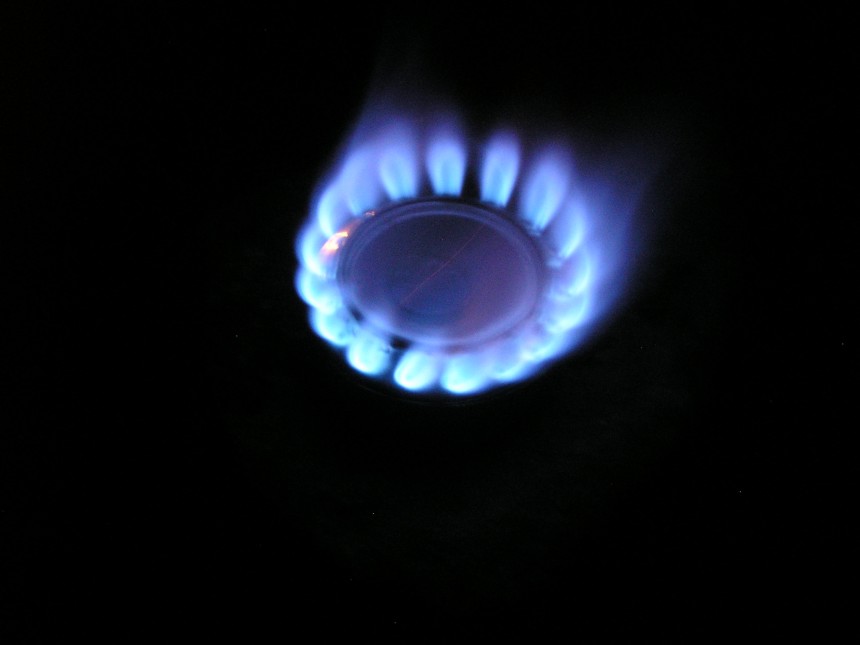
Alcohol Stove in operation
Above: Neat – Huh! The stove ready for heating your coffee, spaghetti-O’s, Cherries Flambe’ or to just boil some water. Looks just like the blue flame jets on a regular household stove. Note that these stoves have no “throttle”. To turn it off before it runs out of fuel – just smother it with your inverted cup.

Beercan stove in canteen stove
Above: Since alcohol vapor burns with a slow “flame speed”, and due in part to the very low stove pressure, it can be blown around/out by a good wind. These things are not raging blow torches…you probably won’t be frying bacon on one. So use some sort of lightweight perimeter wind block if necessary – that will also help the heat stay under the pot.
In this case an older US military canteen stove (NSN 8465-01-250-3632) designed for burning Trioxane “heat tabs” or just twigs. These “stoves” were designed as a convenient canteen cup support/wind break.
While camping, I prefer to use the WWII stainless steel canteens (versus the modern plastic ones). The metal ones can be directly heated if necessary and the water doesn’t taste like the last liquid you had in a plastic one. Note the fishing snap swivel on the cap chain. It is used as a quick disconnect to allow the bakelite cap to be removed for in-fire heating. I also like my 1944, WWII veteran stainless steel canteen cup. It’s been around.

GI Stove with Beer Can Alcohol Burner
Absent a canteen cup stove as above, the cup, a suitable metal pot or the metal canteen itself can be simply placed directly on top of the alcohol stove (below). In that case, you don’t need to block the fill-hole with a coin – the pot does that automatically.

Alcohol Stove direct cup placement
Bubble Bubble, No Toil, No Trouble. Fire Burns, Cauldron Bubbles.
Hard to imagine a lighter, smaller stove for backpacking. A small supply of alcohol in a plastic water bottle will keep you going in the woods. Just throw some chopped pine needles into the cup and brew some pretty good tea.
This little burner also works well in my old veteran “heat tab” folding stove from the 1970’s:

Alcohol powered military folding stove

GI Canteen Cup DIY Cover
Or, if you forget your new stove (or fuel) you can always go back to “Old School” and burn wood. The DIY cover on my WWII veteran G.I. cup speeds things along. Among the many “Pro & Con” considerations is that alcohol or trioxane burns much more cleanly on the hardware than wood.
Just like the fancy stoves
Below: Another alternative for beaucoup heat – My Swedish Svea 123 white gas stove. I still have the little cup and handle but my vintage USGI canteen cup is much more practical.

Svea Brass Camping Stove
This is my old favorite from many back packing trips in the past. I got it in 1976 and it never fails. White gas or unleaded vehicle fuel. A bit heavy! It makes that roaring sound that is so desirable when you are cold and miserable! We’re gonna be eatin’ good!

Two camping veterans
За тебя товарищ!
——————————————————————————————————————————————–
Fire by Friction (and other methods)
Forgot your penny stove? No beer cans? Drank all the Bourbon? How about fire by friction, a handy outdoors skill. The Bow Drill.
It’s harder than it looks in all those You Tube videos. You need the right, dry materials for the wood hearth and spindle, plus cordage, a low-loss bearing, some stamina and most of all, proper technique. Absent any of these essentials, FAIL. You’ll be eating Sushi. Or Squirrel Tartare.
While you shiver the night away.
It took me quite a long time with experimenting and failure to finally get it right. The tools:

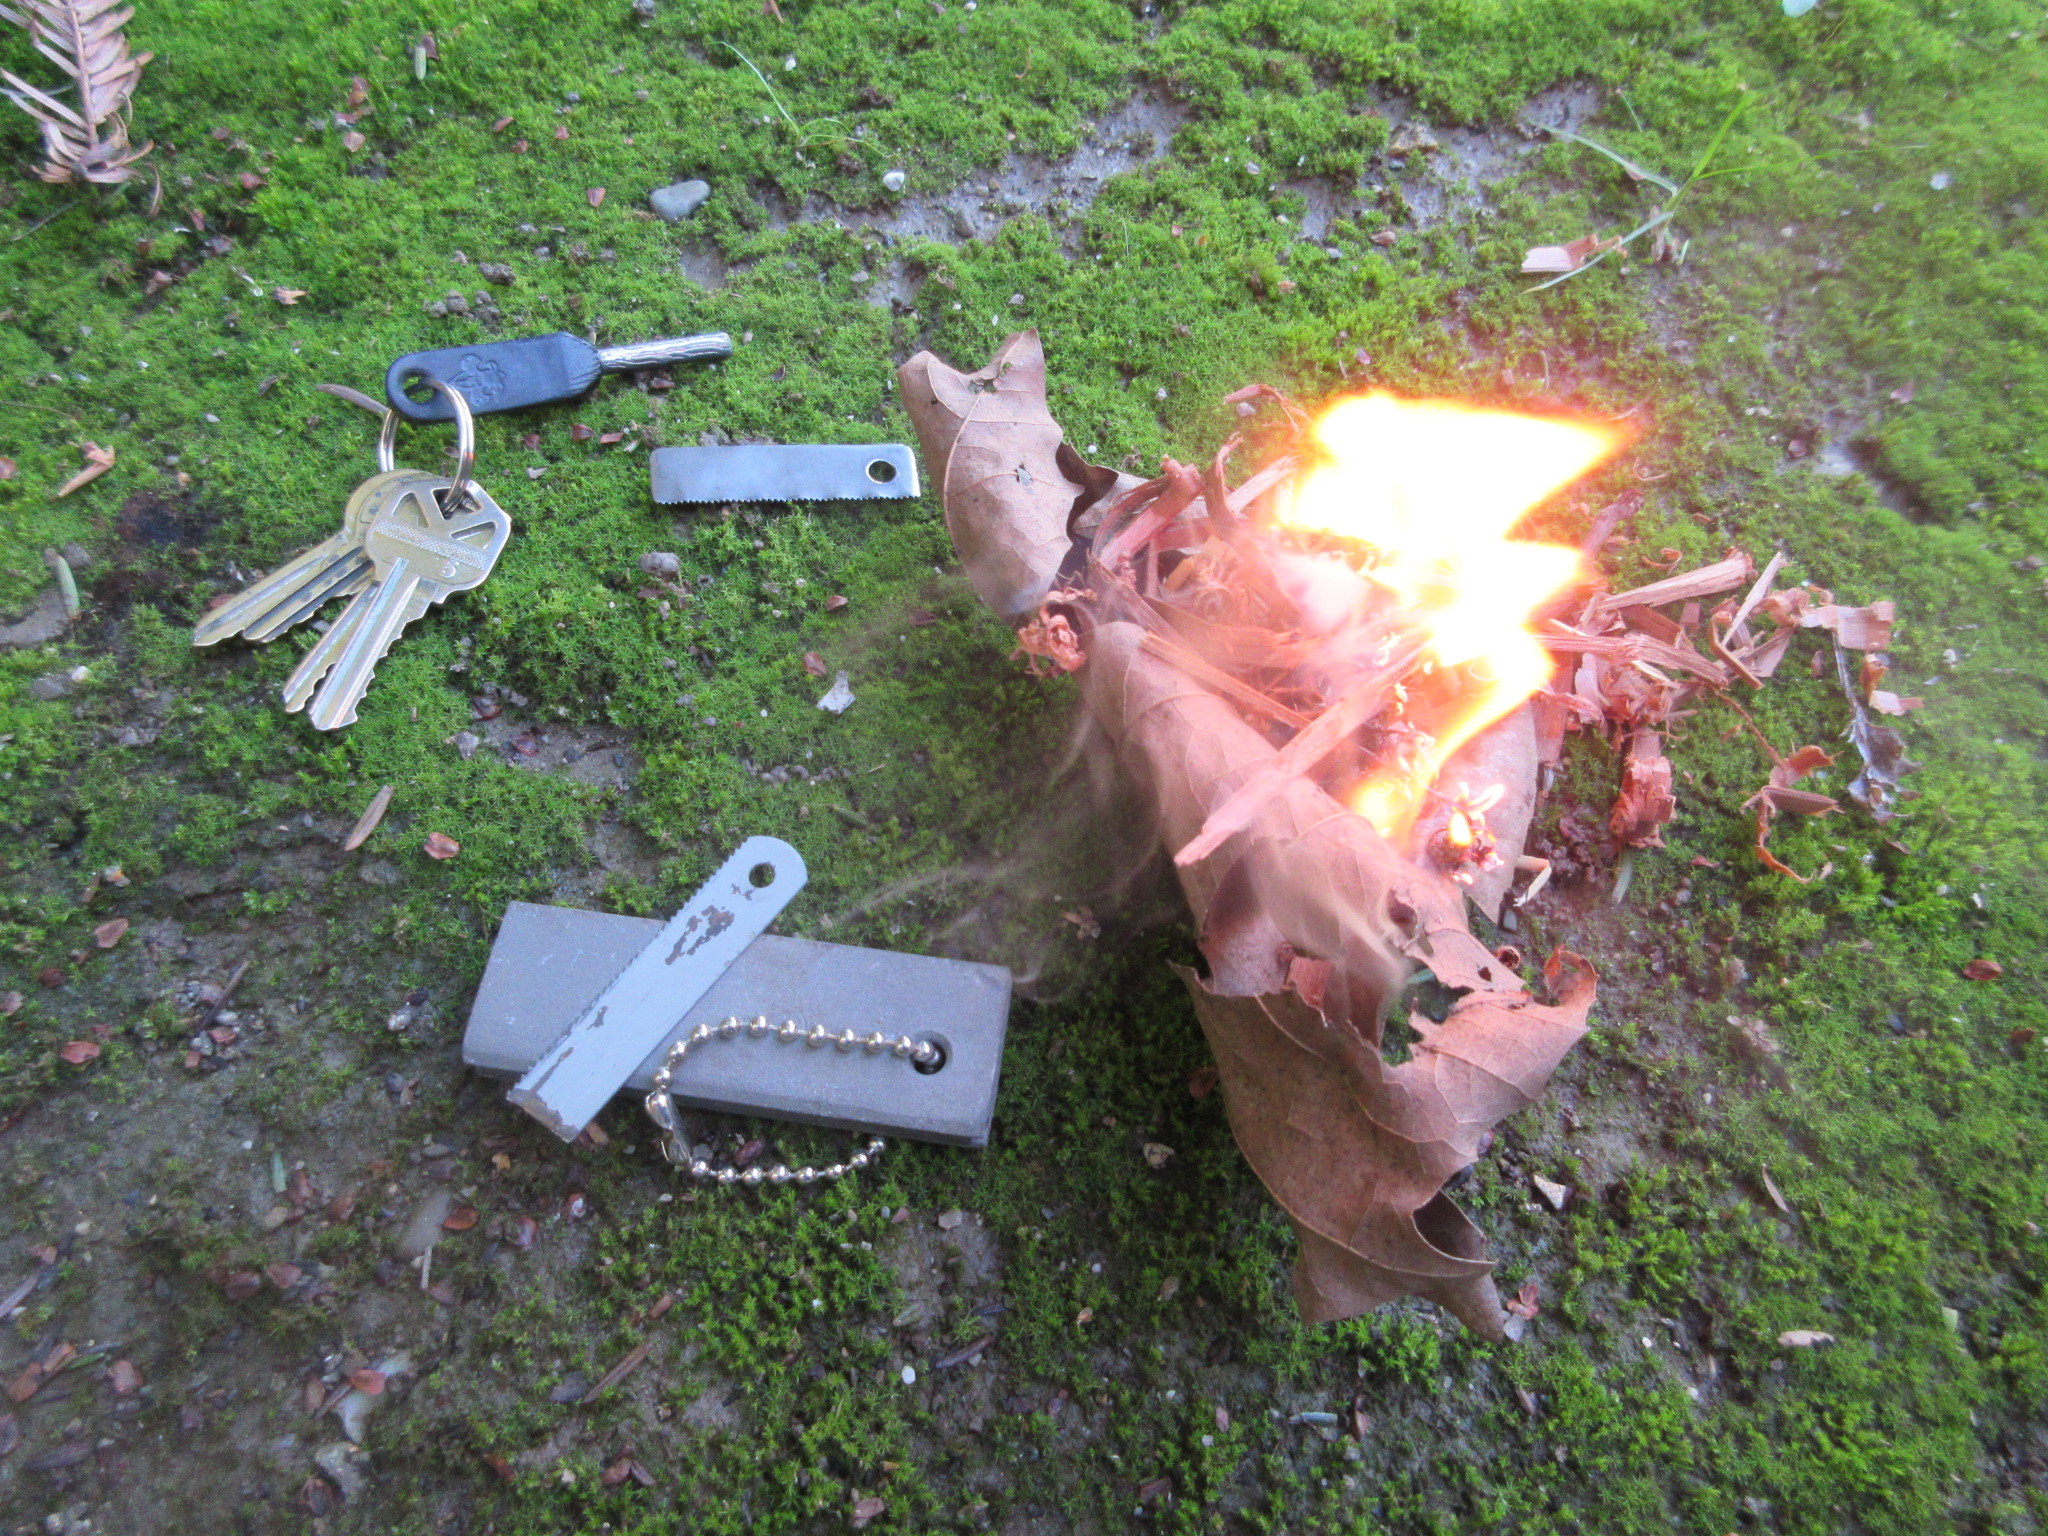
Cedar Bow Drill Set w/Wine bottle
Above: This hearth and spindle are made of dry cedar, good for kindling as well. The bow is a redwood branch. The concave bottom of a broken (or full!) wine bottle makes an excellent upper spindle bearing; very low friction. (Wear gloves) Dull the sharp glass edges with a stone. (I have also tried using a GI spoon, clam shell; a rock with a suitable dimple should also work but the bottle-end is much better, especially as you are learning/practicing.)
The above kit works pretty reliably for me, but not always. Experiment and PRACTICE!
For cordage I have used paracord; here using a piece of duck decoy anchor line which I also carry for hoisting wire antennas. There will also be a boot lace around somewhere. Cordage and a bearing block made of natural materials is for Expert Level. I am a long way from that… It helps to roughen up the spindle with longitudinal scrapes via the sawback of the knife blade – improves “traction”.

Bow drill fire kit with wine bottle bearing
Absent any dry natural plant materials to catch the ember in your birds nest tinder, just use your knife to scrape some fuzz off your blue jeans or other cotton material. Catches the ember once you transfer it into your birds nest tinder.
Another technique is the “hand drill”. Basically the same process as the bow drill except there is no bow. You just twirl the (thinner) spindle between your hands. I took a class from a local primitive technology expert, Norm Kidder, who could get a flame going in less than a minute with the hand drill. Even when I used his spindle and hearth board I could not do it. Takes a lot of strength and tough hands! As with the bow drill, a good understanding of the various subtleties involved is essential.
Other much easier ways are “ferro” rods which are a ferrocerium material commercially available. Made primarily of iron, neodymium and cerium they produce hot sparks when scraped with a steel edge. Below as a small keychain stick along with a short piece of hacksaw blade for a striker (TSA has never noticed it at the airport.)
I like this setup on my key ring because I am likely to always have it with me. Ferro rods like this one are standard items at places that sell Boy Scout stuff; everyone is selling variants. The big fat rods (for your kit) will obviously last longer in the field.

Boy Scout firesteel keychain striker
Fire with ferrocerium stick or combined with a magnesium bar.
Above, getting the tinder going with the key chain set. The magnesium bar also works really great by producing a very hot (5,600 degrees F) initial flame. I keep a short hack saw blade attached to it on the chain as well, both tucked into my field kit. Scrape some magnesium shavings into your tinder, scrape the embedded ferrocerium bar with the hack saw blade or your knife spine. Sparks hit the magnesium shavings, Presto. Even works when wet. A boondocking essential, don’t leave home without one.
These magnesium/striker fire starters have a standard national stock number for issue in the US military. (NSN 4240-01-160-5618). The copies from China do not work as well, reasons unknown.
There are lots of books and YouTube videos available demonstrating fire by friction . Caveat Emptor.
Tim:
Excellent idea! I have a lightweight German stove as a complement to my ski emergency kit. It uses little white heat tabs. I should haul it our and test its efficiency vs. this innovative machine.
Best,
Bill
Well certainly not my idea – but pretty clever and simple. And made from junk!
Great post…I use the Trangia brass version with the screw on lid, to keep fuel in unit when done and traveling, no leakage issues…
I use yellow bottle HEET too, works like a champ….
You might check out the fireant multi fuel stove designed to work with trangias too, or heat tabs, or wood…awesome piece of kit….
Hi RF, thanks for checking in…Yep, a “plug” to keep fuel from leaking out or evaporating while traveling would be a good improvement (but a further complication).. Also, a simple multi fuel stove that burns twigs is obviously a good idea for self-sufficiency while in the woods – fuel abounds. The little military canteen stove also works quite well with twigs too. Simple, lightweight, small.
Good bush fun!
Tim